

I absolutely love the holiday season because it is the perfect time to get creative in the kitchen with my family without the stress of complicated recipes. These Christmas Oreos have become a staple in my home when I want a festive treat that looks impressive but takes very little effort. They are bright, crunchy, and always the first thing to disappear at our annual cookie exchange.
Recipe Details
Recipe Information
- Prep Time: 25 minutes
- Cook Time: 0 minutes
- Total Time: 25 minutes
- Servings: 24 cookies
- Difficulty: Easy
Nutrition Information (Per Serving)
- Calories: 160 kcal
- Protein: 1g
- Carbs: 22g
- Fat: 8g
Why You’ll Love This Christmas Oreos
You will love this recipe because it requires absolutely no baking, making it perfect for busy December days. It is a fantastic project for kids to help with since they can go wild with the sprinkles and decorations. Plus, the combination of the classic chocolate wafer and a creamy coating is a crowd favorite that never goes out of style. Whether you need a last-minute gift or a beautiful addition to your dessert platter, these treats deliver every time.
Christmas Oreos Ingredients & Substitutions
- 1 package (14.3 ounces) Oreo cookies
- 16 ounces white candy melts or white chocolate chips
- 2 teaspoons coconut oil or vegetable shortening
- 1 teaspoon alcohol-free vanilla extract
- 3 tablespoons red and green holiday sprinkles
- 2 ounces dark chocolate or red candy melts for drizzling
If you prefer a different flavor, you can swap the standard Oreos for peppermint or golden varieties. White chocolate chips work well if you do not have candy melts, though you might need a bit more coconut oil to achieve a smooth dipping consistency. For those who enjoy a bit of texture, crushed candy canes can be used instead of sprinkles for a refreshing minty crunch.
Step-by-Step Instructions to Make Christmas Oreos
Step 1: Preparation
Begin by lining a large baking sheet with parchment paper or a silicone baking mat. This ensures the cookies do not stick once the coating sets. Set up a station with your cookies, sprinkles, and any other decorations so they are ready to go as soon as the chocolate is melted.
Step 2: Melt the Coating
In a microwave-safe bowl, combine the white candy melts and coconut oil. Heat in 30-second intervals, stirring thoroughly between each session until the mixture is completely smooth. Stir in the alcohol-free vanilla extract to give the coating a lovely aromatic boost.
Step 3: Dip the Cookies
Drop one Oreo into the melted mixture at a time. Use a fork to flip the cookie and ensure it is fully coated. Lift the cookie with the fork and gently tap it against the side of the bowl to let the excess coating drip off. This creates a clean and professional finish.
Step 4: Add the Decorations
Carefully place the coated cookie onto the prepared parchment paper. While the coating is still wet, immediately add your red and green sprinkles. If you wait too long, the coating will harden and the decorations will not stick. If you are using a drizzle, let the base coat set for five minutes first.
Step 5: Let the Cookies Set
Allow the cookies to sit at room temperature for about 30 minutes until the coating is firm to the touch. If you are in a hurry, you can place the tray in the refrigerator for 10 to 15 minutes. Once they are fully set, they are ready to be served or packaged.
Tips for Success
To get the smoothest finish, avoid overheating your chocolate as it can become thick and clumpy. If the mixture starts to harden while you are still dipping, simply pop it back into the microwave for 15 seconds. Using a chocolate dipping tool or a simple plastic fork with the center tines removed can help the excess chocolate drain more efficiently. Always make sure your workspace is cool so the chocolate sets properly without blooming or becoming dull.
Variations of Christmas Oreos
There are so many ways to customize this treat to fit your personal style. You can use milk chocolate or dark chocolate as the base coating for a richer flavor profile. For a “melted snowman” look, use white coating and add tiny orange sprinkles for noses and mini chocolate chips for eyes. Another popular choice is to use peppermint-flavored Oreos and top them with crushed candy canes to lean into that classic winter flavor combination.
Serving Suggestions: What to Pair with Christmas Oreos
These festive cookies are delightful when served alongside a warm mug of cocoa or a steaming cup of coffee. They also make a beautiful addition to a holiday charcuterie board filled with nuts, dried fruits, and various cheeses. For a fun party idea, stack them in clear glass jars to use as edible centerpieces that guests can snack on throughout the evening.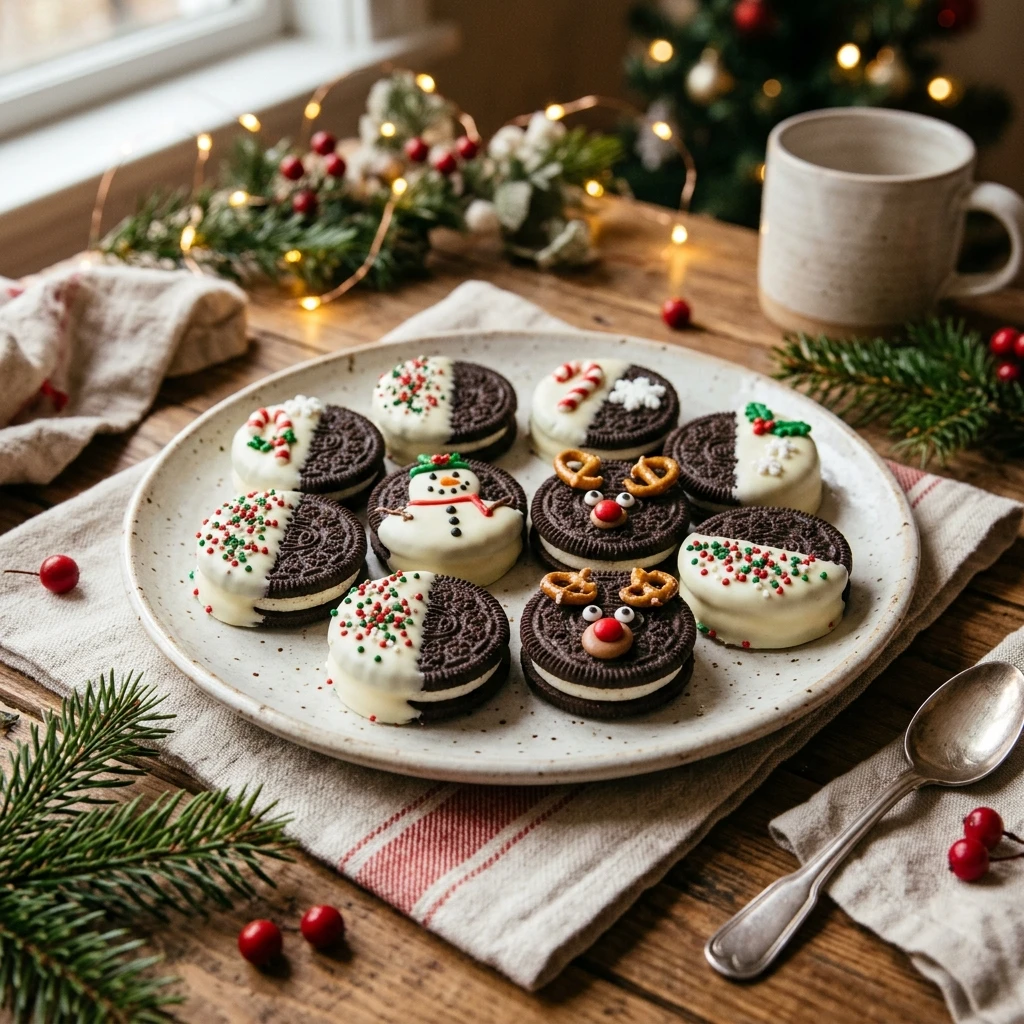
Storage & Reheating Instructions
Store these treats in an airtight container at room temperature for up to two weeks. If your kitchen is particularly warm, it is best to keep them in the refrigerator to prevent the chocolate from softening. You can also freeze them for up to three months by layering them between sheets of parchment paper in a freezer-safe bag. There is no need for reheating, as these are best enjoyed chilled or at room temperature.
Memories Made Around the Table
I remember one specific Christmas Eve where the power went out during a snowstorm. We couldn’t use the oven, so we sat around the kitchen island with a bowl of melted chocolate over a few candles and dipped these cookies together. It turned a potentially stressful night into one of our favorite family traditions. Now, every time I smell the sweet scent of white chocolate and vanilla, I am transported back to that cozy, candlelit kitchen filled with laughter and sticky fingers.
FAQs
Can I use regular white chocolate bars instead of candy melts?
Yes, you can use high-quality white chocolate bars. Just be sure to chop them into small, even pieces so they melt uniformly. You may need to be more careful with the temperature to prevent the chocolate from seizing.
How do I prevent the Oreos from leaving crumbs in the melted chocolate?
To keep your coating clean, try to handle the cookies gently. You can also use a “sacrificial” cookie to stir the chocolate if needed, but generally, dipping quickly and lifting straight up with a fork minimizes crumb shedding.
Can I make these Christmas Oreos in advance?
Absolutely. These are one of the best make-ahead treats because they stay fresh for a long time. Making them a few days before your event actually saves you time on the day of the party.
What is the best way to package these for gifts?
Place the cookies in cellophane bags and tie them with a festive red or green ribbon. They also look wonderful in small tin boxes lined with colorful tissue paper. Just ensure they are fully set before stacking them.
Can I use food coloring to dye the white chocolate?
Yes, but you must use oil-based food coloring. Water-based liquid coloring will cause the chocolate to seize and become a grainy mess. Oil-based dyes are specifically designed for chocolate and candy melts.
Final Thoughts
These Christmas Oreos are the ultimate holiday hack for anyone who wants a beautiful, delicious dessert without the hassle of traditional baking. They bring a pop of color to any table and offer a satisfying crunch that everyone loves. I hope this recipe brings as much joy to your holiday celebrations as it does to mine. Happy dipping and Merry Christmas!


Christmas Oreos
- Total Time: 25 minutes
Ingredients
- 1 package (14.3 ounces) Oreo cookies
- 16 ounces white candy melts or white chocolate chips
- 2 teaspoons coconut oil or vegetable shortening
- 1 teaspoon alcohol-free vanilla extract
- 3 tablespoons red and green holiday sprinkles
- 2 ounces dark chocolate or red candy melts for drizzling
Instructions
- Step 1: Preparation. Begin by lining a large baking sheet with parchment paper or a silicone baking mat. This ensures the cookies do not stick once the coating sets. Set up a station with your cookies, sprinkles, and any other decorations so they are ready to go as soon as the chocolate is melted.
- Step 2: Melt the Coating. In a microwave-safe bowl, combine the white candy melts and coconut oil. Heat in 30-second intervals, stirring thoroughly between each session until the mixture is completely smooth. Stir in the alcohol-free vanilla extract to give the coating a lovely aromatic boost.
- Step 3: Dip the Cookies. Drop one Oreo into the melted mixture at a time. Use a fork to flip the cookie and ensure it is fully coated. Lift the cookie with the fork and gently tap it against the side of the bowl to let the excess coating drip off. This creates a clean and professional finish.
- Step 4: Add the Decorations. Carefully place the coated cookie onto the prepared parchment paper. While the coating is still wet, immediately add your red and green sprinkles. If you wait too long, the coating will harden and the decorations will not stick. If you are using a drizzle, let the base coat set for five minutes first.
- Step 5: Let the Cookies Set. Allow the cookies to sit at room temperature for about 30 minutes until the coating is firm to the touch. If you are in a hurry, you can place the tray in the refrigerator for 10 to 15 minutes. Once they are fully set, they are ready to be served or packaged.
- Cook Time: 25 minutes
- Diet: Vegetarian