
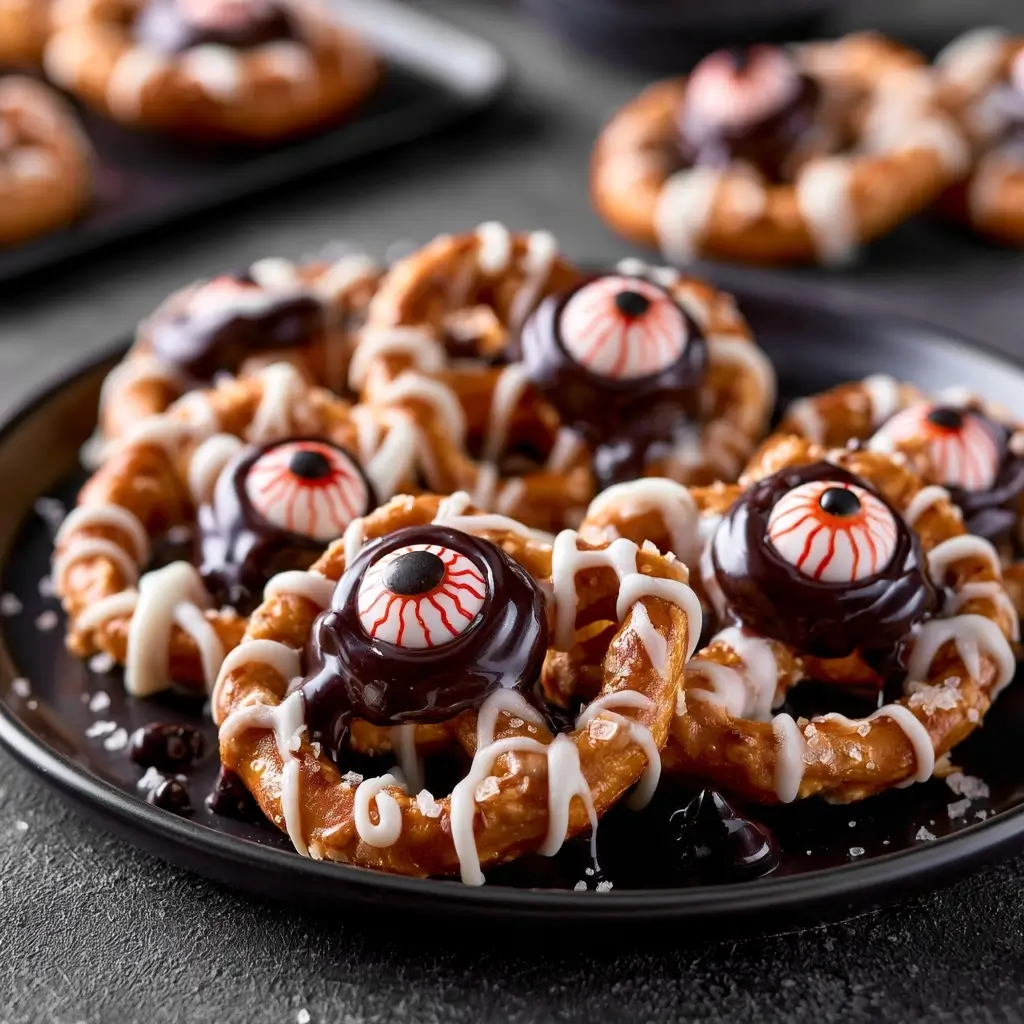
If you need a spooky treat that is playful, salty-sweet, and easy to make with kids, these Pretzel Monster Eyeballs are such a fun pick. They come together with simple ingredients and a few decorating tricks that make them look party-ready fast.
Pretzel Monster Eyeballs
Equipment
- 1 Parchment-Lined Baking Sheet
- 1 Microwave-safe Bowl
Ingredients
- 24 pretzel twists or rounds
- 1 cup peanut butter or sunflower seed butter
- 1 cup powdered sugar
- 1 tsp alcohol-free vanilla
- 1 cup white chocolate or white candy melts melted
- 1 green food coloring optional
- 24 mini chocolate chips for pupils
- 1 colored sprinkles or candy eyes for decoration
Instructions
- Mix the peanut butter, powdered sugar, and alcohol-free vanilla until smooth and thick enough to shape. If you want a brighter monster look, stir in a little green food coloring.
- Scoop small portions of the filling and roll them into balls. Place them on a parchment-lined tray so they stay neat while you prepare the coating.
- Arrange the pretzels on a lined baking sheet. If using pretzel twists, make sure they sit flat so the topping stays in place.
- Melt the white chocolate or candy melts until smooth. Spoon a little over each pretzel, then gently press a filling ball on top so it sticks.
- Press a mini chocolate chip into the center for the pupil. Add sprinkles or candy eyes around it to make each one look extra spooky and fun.
- Allow the Pretzel Monster Eyeballs to firm up at room temperature, or chill them briefly until set. Once they are ready, transfer them to a serving plate.
Notes
Why You’ll Love This Pretzel Monster Eyeballs
These little treats are festive, eye-catching, and wonderfully simple. The crunchy pretzel base, creamy coating, and candy-like decoration make every bite fun to eat.
You will also love how flexible they are. They work well for Halloween parties, school events, dessert tables, or a weekend kitchen project with kids.
Pretzel Monster Eyeballs Ingredients & Substitutions
- Pretzel twists or rounds, for the salty base
- White chocolate or white candy melts, for coating
- Peanut butter or sunflower seed butter, for a creamy center
- Powdered sugar, to help thicken the filling
- Green food coloring, optional, for a monster look
- Mini chocolate chips, for the pupils
- Colored sprinkles or candy eyes, for decoration
- Alcohol-free vanilla, for flavor
If you need a nut-free option, use sunflower seed butter. For a different color theme, swap the green coloring for purple or orange.
Step-by-Step Instructions to Make Pretzel Monster Eyeballs
Step 1: Make the filling
Mix the peanut butter, powdered sugar, and alcohol-free vanilla until smooth and thick enough to shape. If you want a brighter monster look, stir in a little green food coloring.
Step 2: Shape the centers
Scoop small portions of the filling and roll them into balls. Place them on a parchment-lined tray so they stay neat while you prepare the coating.
Step 3: Prepare the pretzels
Arrange the pretzels on a lined baking sheet. If using pretzel twists, make sure they sit flat so the topping stays in place.
Step 4: Add the white coating
Melt the white chocolate or candy melts until smooth. Spoon a little over each pretzel, then gently press a filling ball on top so it sticks.
Step 5: Decorate the eyes
Press a mini chocolate chip into the center for the pupil. Add sprinkles or candy eyes around it to make each one look extra spooky and fun.
Step 6: Let them set
Allow the Pretzel Monster Eyeballs to firm up at room temperature, or chill them briefly until set. Once they are ready, transfer them to a serving plate.
Tips for Success
Work with small batches of melted chocolate so it stays smooth and easy to use. If it starts to thicken, warm it again in short bursts.
Use a light hand with the filling, since a smaller center is easier to coat and decorate. Lining the tray with parchment also helps with cleanup and keeps everything from sticking.
Variations of Pretzel Monster Eyeballs
Try using milk or dark chocolate instead of white chocolate for a different flavor. You can also swap the filling color to match your party theme.
For extra crunch, sprinkle crushed pretzels or finely chopped nuts over the coating before it sets. Another fun option is to use different candy shapes for the pupils and make each monster eyeball unique.
Serving Suggestions: What to Pair with Pretzel Monster Eyeballs
Serve these with hot chocolate, apple cider, or a fruit platter for a balanced snack table. They also look cute alongside other Halloween desserts like cupcakes, popcorn mix, or cookie bars.
If you are setting up a party tray, place them near savory bites so guests get a nice mix of sweet and salty options.
Storage & Reheating Instructions
Store Pretzel Monster Eyeballs in an airtight container at room temperature for up to 3 days, or in the fridge for up to 1 week. Separate layers with parchment paper so they do not stick together.
These treats do not need reheating. If chilled, let them sit out for a few minutes before serving so the coating softens slightly.
Memories Made Around the Table
Some of my favorite kitchen moments happen when simple recipes turn into little decorating projects. These Pretzel Monster Eyeballs are the kind of treat that gets everyone laughing, snacking, and reaching for one more.
FAQs
Can I make Pretzel Monster Eyeballs ahead of time?
Yes, they are great for making ahead. You can prepare them a day or two before your event and store them in an airtight container.
What can I use instead of peanut butter?
Sunflower seed butter works well if you want a nut-free option. It has a similar texture and helps the filling hold its shape.
Can I use regular chocolate instead of white chocolate?
Absolutely. Milk or dark chocolate works nicely, though the monster eye look will be a little less bright.
How do I keep the coating smooth?
Melt the chocolate slowly and avoid overheating it. If it thickens, stir in short intervals until it becomes smooth again.
Final Thoughts
Pretzel Monster Eyeballs are a playful, easy treat that brings a lot of fun to the table with very little effort. Whether you make them for a party or just for a cozy afternoon project, they are sure to disappear quickly.