
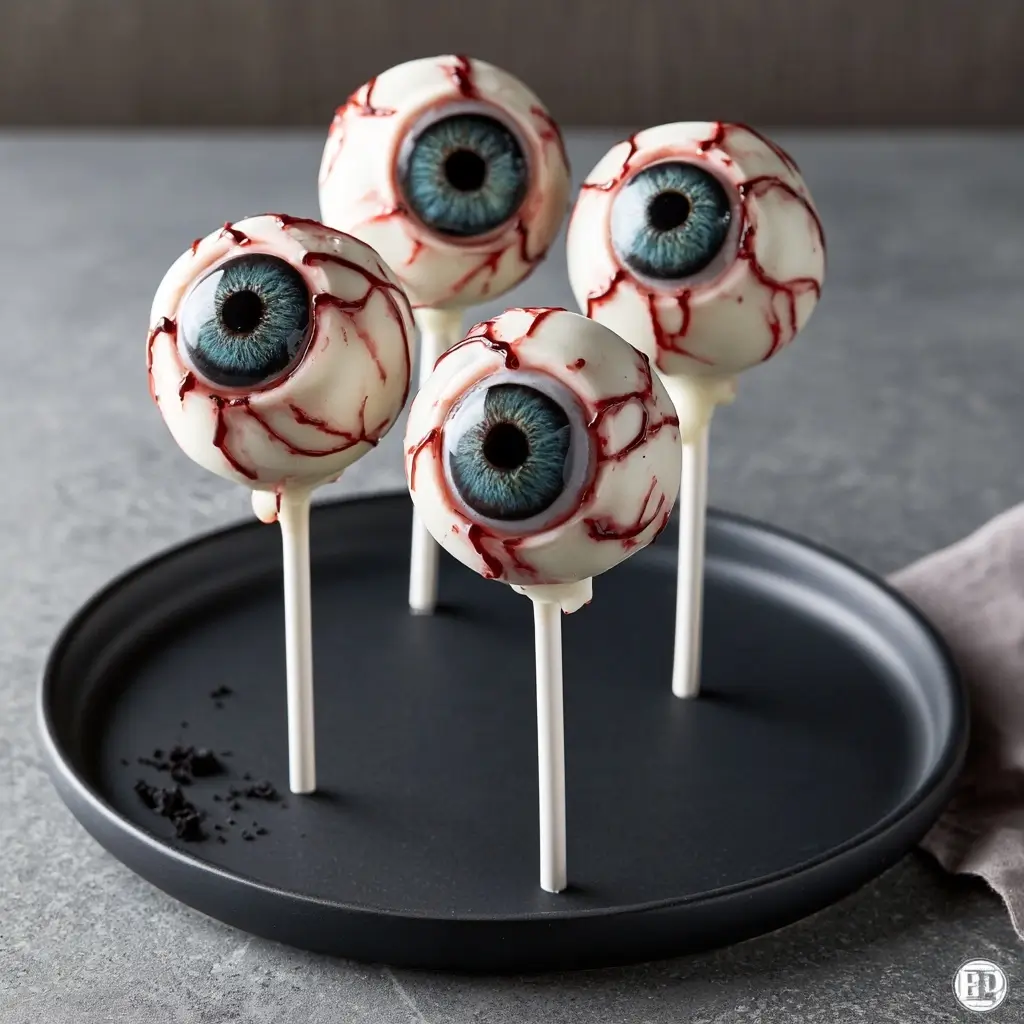
These Monster Eyeball Cake Pops are a playful treat that always gets a smile at parties and Halloween gatherings. They’re sweet, colorful, and surprisingly simple to make with a few basic ingredients and a little decorating fun.
Monster Eyeball Cake Pops
Equipment
- 1 Large bowl
- 1 Lined tray
- 1 Microwave-safe Bowl
Ingredients
- 1 baked cake cooled completely
- 0.5 cup frosting to 3/4 cup
- 8 ounces candy melts or coating chocolate
- 12 cake pop sticks
- 12 candy eyeballs or round white candy decorations
- 1 colored candy melts or sprinkles for decoration
Instructions
- Place the cooled cake in a large bowl and crumble it into fine, even pieces with your hands.
- Add the frosting a little at a time, then mix until the texture feels like soft dough and holds together when pressed.
- Scoop the mixture into small portions and roll them into balls. Set them on a lined tray and chill until firm.
- Melt a small amount of candy coating, dip the tip of each stick into the coating, then insert it into each chilled cake ball.
- Dip each cake pop into the melted coating, let the excess drip off, then add the eyeball decorations before the coating sets. Finish with extra candy details if you want a more monster-like look.
- Stand the finished cake pops upright until the coating hardens completely.
Notes
Why You’ll Love This Monster Eyeball Cake Pops
These cake pops are a fun mix of soft cake, creamy frosting, and smooth candy coating. They look impressive on a dessert table, but the process is beginner-friendly and easy to customize with your favorite colors.
Monster Eyeball Cake Pops Ingredients & Substitutions
You only need a handful of ingredients to make these festive cake pops. Here is a simple list to get started:
- 1 baked cake, cooled completely
- 1/2 to 3/4 cup frosting
- 8 ounces candy melts or coating chocolate
- Cake pop sticks
- Candy eyeballs or round white candy decorations
- Colored candy melts or sprinkles for decoration
If you want to change things up, use vanilla or chocolate cake, homemade or store-bought frosting, and any candy coating color you like. If you prefer extra flavor, add a little alcohol-free vanilla to the frosting. For the eyes, you can use candy eyeballs, white chocolate discs, or piped candy dots.
Step-by-Step Instructions to Make Monster Eyeball Cake Pops
Step 1: Crumble the cake
Place the cooled cake in a large bowl and crumble it into fine, even pieces with your hands.
Step 2: Mix in the frosting
Add the frosting a little at a time, then mix until the texture feels like soft dough and holds together when pressed.
Step 3: Shape the cake pops
Scoop the mixture into small portions and roll them into balls. Set them on a lined tray and chill until firm.
Step 4: Add the sticks
Melt a small amount of candy coating, dip the tip of each stick into the coating, then insert it into each chilled cake ball.
Step 5: Coat and decorate
Dip each cake pop into the melted coating, let the excess drip off, then add the eyeball decorations before the coating sets. Finish with extra candy details if you want a more monster-like look.
Step 6: Let them set
Stand the finished cake pops upright until the coating hardens completely.
Tips for Success
Chilling the cake balls before dipping helps them stay round and secure on the sticks. Work with small batches of melted coating so it stays smooth, and if the cake mixture feels too soft, add a bit more cake crumbs before shaping.
Variations of Monster Eyeball Cake Pops
You can make these in spooky green, deep purple, bright orange, or classic white. Try different cake flavors, like chocolate, funfetti, or red velvet, and swap the eyeball decorations for colorful sprinkles, drizzles, or edible glitter.
Serving Suggestions: What to Pair with Monster Eyeball Cake Pops
These cake pops are great with a bowl of popcorn, a tray of cookies, or a festive fruit platter. They also pair nicely with milk, hot chocolate, or a simple party punch served alongside other sweet treats.
Storage & Reheating Instructions
Store the cake pops in an airtight container in the refrigerator for up to 5 days. For longer storage, freeze them in a single layer first, then move them to a freezer-safe container. Let frozen cake pops thaw in the refrigerator before serving, and avoid reheating them.
Memories Made Around the Table
These are the kind of treats that bring people into the kitchen, especially little helpers who love rolling, dipping, and decorating. I always think recipes like this are less about perfection and more about the fun of making something together.
FAQs
Can I make Monster Eyeball Cake Pops ahead of time?
Yes, you can make them a day or two in advance. Keep them chilled until you are ready to serve.
Why are my cake pops falling off the stick?
The cake balls may be too warm or too soft. Chill them longer, and make sure to dip the stick in melted coating before inserting it.
Can I use store-bought cake?
Absolutely. Store-bought cake works well and can save time, especially when you want a quicker decorating project.
How do I keep the coating smooth?
Melt the candy coating slowly and stir often. If it thickens, add a little more melted coating or a small amount of neutral oil designed for candy melts.
Final Thoughts
Monster Eyeball Cake Pops are a cheerful, creative treat that always feels special. They’re easy to personalize, fun to make, and perfect for sharing at any festive gathering.