
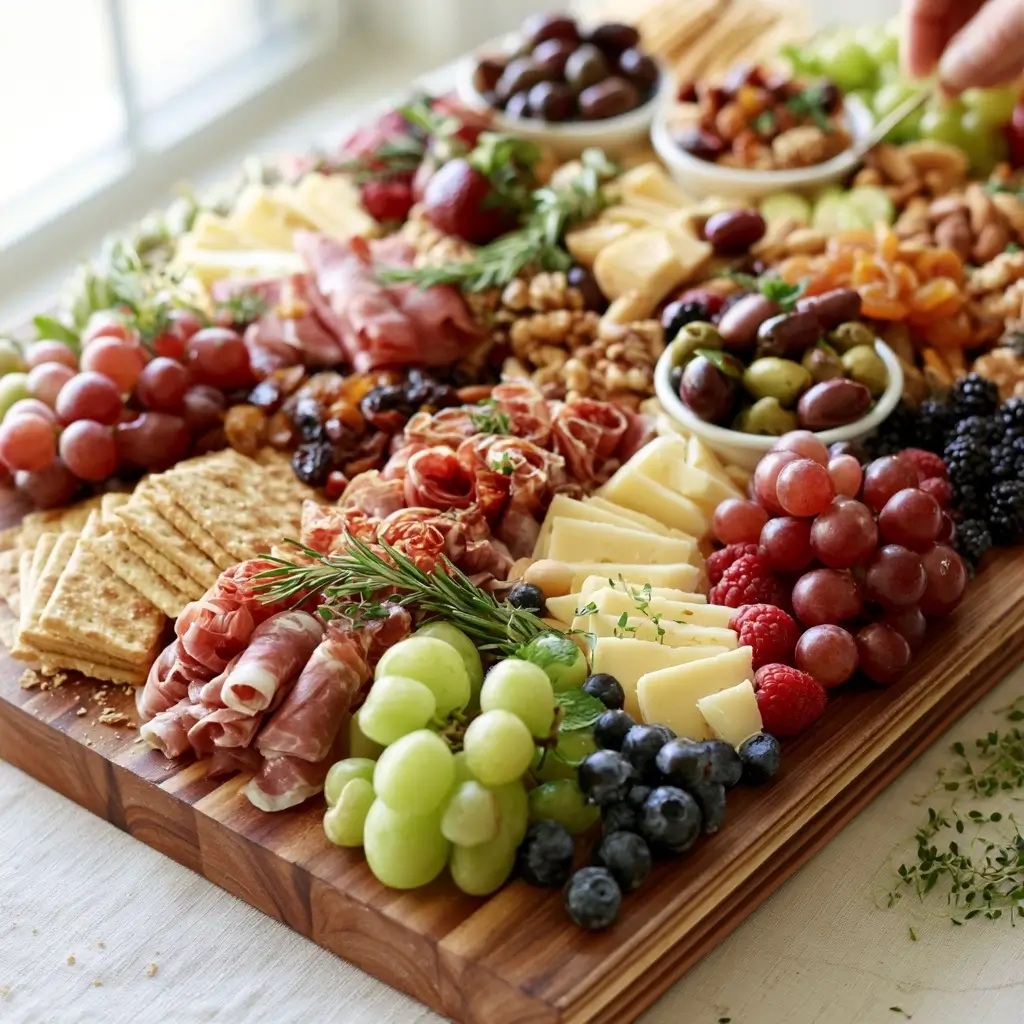
If you have ever stared at an empty board and wondered where to begin, you are in the right place. This visual guide breaks the process into simple, beginner-friendly steps so you can build a beautiful charcuterie board with confidence.
Charcuterie Board Made Easy
Equipment
- 1 Wooden board or large platter
- 1 Small bowls for honey, jam, or dips
- 1 Cheese knives or small serving utensils optional
Ingredients
- Assorted cheeses such as cheddar, gouda, brie, or mozzarella
- Cured meats such as turkey salami or turkey pepperoni
- Crackers and sliced baguette
- Fresh fruit such as grapes, strawberries, apple slices, or figs
- Dried fruit such as apricots or cranberries
- Nuts such as almonds, pistachios, or walnuts
- Olives or pickled vegetables
- Honey jam, or fruit preserves
- Fresh herbs such as rosemary or thyme, for garnish
Instructions
- Start with a wooden board, large platter, or even a clean baking sheet. The surface does not have to be fancy, it just needs enough room for everything to fit without feeling crowded.
- Set down the cheeses, small bowls of honey or jam, and any larger items like fruit clusters or folded meat slices. These anchor the layout and help you plan the rest of the design.
- Arrange the meats in loose ribbons or small folds so they look full and natural. Cut some cheeses into slices or cubes, and leave a few pieces whole for visual variety.
- Now tuck in grapes, berries, nuts, olives, and crackers. Try to spread colors across the board instead of grouping all one item together, because that keeps the overall look balanced.
- Add fresh herbs, a few extra crackers around the edges, and tiny gaps of space so the board still feels airy. The best boards look abundant, but not squeezed together.
Notes
Why You’ll Love This Charcuterie Board Made Easy
This is the kind of recipe-style guide that feels impressive without being complicated. You can mix and match colors, textures, and flavors, then arrange everything in a way that looks polished and inviting.
It is also wonderfully flexible. Whether you are hosting a small family gathering or putting out a casual snack board, you can scale it up or down with what you already have on hand.
Charcuterie Board Made Easy Ingredients & Substitutions
For a balanced board, choose a mix of salty, creamy, crisp, sweet, and fresh ingredients.
- Assorted cheeses, such as cheddar, gouda, brie, or mozzarella
- Cured meats, such as turkey salami or turkey pepperoni
- Crackers and sliced baguette
- Fresh fruit, such as grapes, strawberries, apple slices, or figs
- Dried fruit, such as apricots or cranberries
- Nuts, such as almonds, pistachios, or walnuts
- Olives or pickled vegetables
- Honey, jam, or fruit preserves
- Fresh herbs, such as rosemary or thyme, for garnish
Easy substitutions are part of the fun. Swap in your favorite cheeses, use gluten-free crackers if needed, or add hummus and roasted vegetables for a more snack-style board.
Step-by-Step Instructions to Make Charcuterie Board Made Easy
Step 1, Choose your board
Start with a wooden board, large platter, or even a clean baking sheet. The surface does not have to be fancy, it just needs enough room for everything to fit without feeling crowded.
Step 2, Place the larger items first
Set down the cheeses, small bowls of honey or jam, and any larger items like fruit clusters or folded meat slices. These anchor the layout and help you plan the rest of the design.
Step 3, Add the meats and cheeses
Arrange the meats in loose ribbons or small folds so they look full and natural. Cut some cheeses into slices or cubes, and leave a few pieces whole for visual variety.
Step 4, Fill in with color and texture
Now tuck in grapes, berries, nuts, olives, and crackers. Try to spread colors across the board instead of grouping all one item together, because that keeps the overall look balanced.
Step 5, Finish with small details
Add fresh herbs, a few extra crackers around the edges, and tiny gaps of space so the board still feels airy. The best boards look abundant, but not squeezed together.
Tips for Success
Use odd numbers when possible, since three cheeses or five fruit accents often look more natural. Also, vary shapes and sizes, one round cheese, one sliced cheese, and one wedge can make the board feel more dynamic.
Keep the board at room temperature for a short time before serving so the cheeses taste their best. If you are preparing ahead, wait to add crackers and delicate fruit until just before serving.
Variations of Charcuterie Board Made Easy
You can lean sweet by adding chocolate, dried cherries, and extra berries. For a breakfast-style board, try cream cheese, sliced fruit, muffins, and granola clusters.
If you want a more savory spread, include hummus, roasted peppers, marinated artichokes, and crunchy vegetables. You can even build a dessert board with cookies, fruit, marshmallows, and dipping sauces.
Serving Suggestions: What to Pair with Charcuterie Board Made Easy
This board pairs nicely with sparkling water, fresh lemonade, iced tea, or fruit juice. It also works well alongside soup, salad, or a simple pasta dish for a relaxed meal.
For a gathering, serve it with extra napkins, small plates, and cheese knives so guests can help themselves easily. A few small forks or toothpicks can make serving even smoother.
Storage & Reheating Instructions
Store leftover cheese, meats, fruit, and dips in separate airtight containers in the refrigerator. Crackers should be kept in a dry container at room temperature so they stay crisp.
This kind of board is best assembled shortly before serving, but leftovers can still be enjoyed the next day. There is no reheating needed, just refresh the arrangement with a few new crackers or fruit slices if desired.
Memories Made Around the Table
There is something special about a board like this, it naturally brings people together. Everyone reaches, chats, and builds their own little plate, which makes the moment feel relaxed and welcoming.
FAQs
How far in advance can I make a charcuterie board?
You can prep many items a few hours ahead, but it is best to assemble the full board close to serving time. Add crackers and delicate fruit at the end so they stay fresh and crisp.
What cheeses work best for beginners?
Choose a mix of soft, semi-firm, and firm cheeses. Cheddar, brie, gouda, and mozzarella are all easy options that most guests enjoy.
How do I make the board look full?
Use small bowls, cluster similar items in a few spots, and fill empty spaces with fruit, nuts, or crackers. A board looks fuller when everything has a place to sit close together.
Can I make this without meat?
Yes, absolutely. Add extra cheese, hummus, roasted vegetables, nuts, fruit, and olives for a satisfying meat-free board.
Final Thoughts
Once you learn the basic pattern, making a charcuterie board becomes simple and enjoyable. Start with a few good ingredients, trust your eye, and let the board come together naturally.