
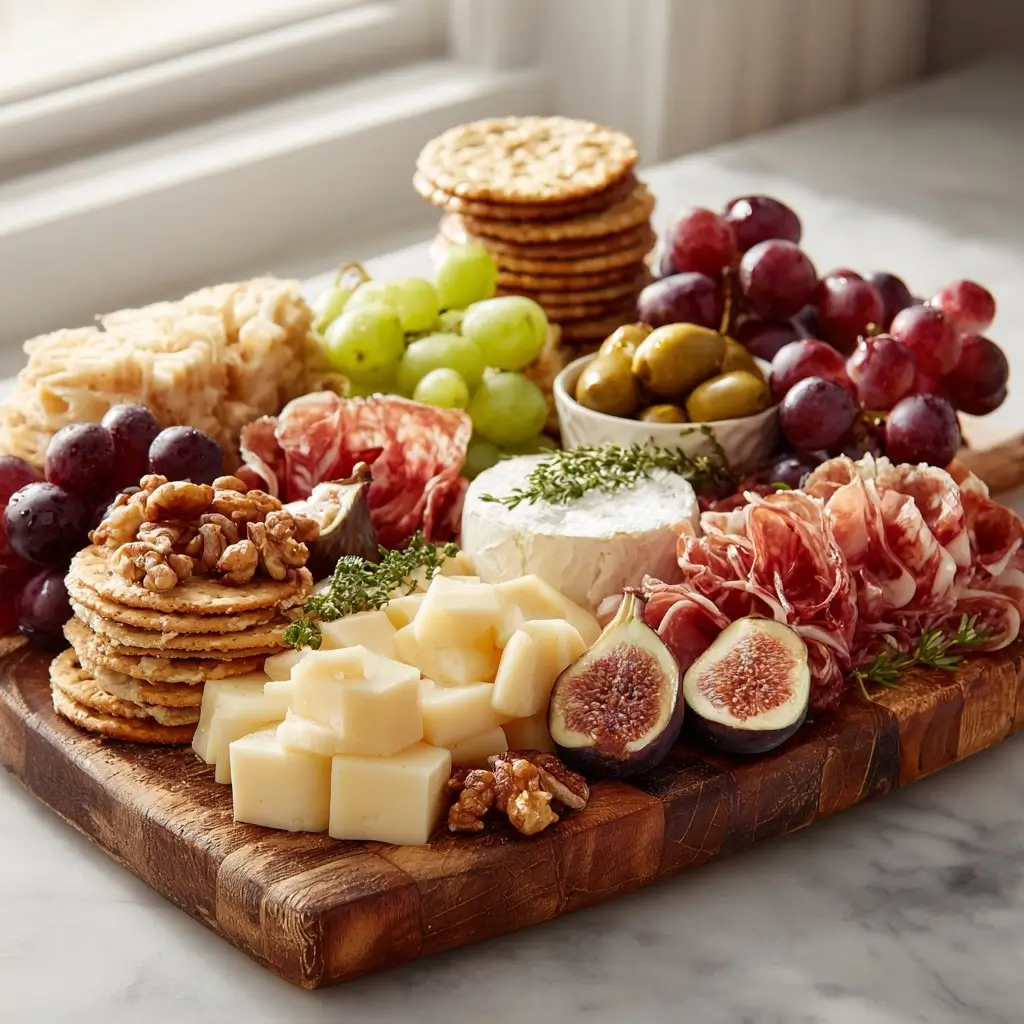
If you’ve ever wanted to build a board that looks polished without feeling fussy, you’re in the right place. These charcuterie plating tips will help you style a beautiful spread with easy balance, color, and texture.
Charcuterie Board Tips
Equipment
- 1 Board or Platter
- 1 Small bowls optional
Ingredients
Board Ingredients
- Cheese a mix of soft, firm, and crumbly cheeses
- Turkey slices or turkey bacon
- Fresh fruit such as grapes, berries, figs, or sliced apples
- Dried fruit
- Crackers or sliced bread
- Nuts like almonds, pistachios, or walnuts
- Olives or pickles
- Fresh herbs such as rosemary, thyme, or basil
- Honey jam, or fruit preserves
- Chocolate or small cookies optional
Instructions
- Start with a board, platter, or large serving tray. A wooden board feels classic, but a marble or ceramic platter works beautifully too.
- Set down the largest items first, like cheese wedges, small bowls, or folded slices of turkey. Spacing these around the board helps create a natural flow.
- Fill in with crackers, fruit, nuts, and olives. Tuck each item close together so the board looks full and inviting.
- Mix soft, crisp, glossy, and creamy ingredients. A little contrast goes a long way in making the board look styled and intentional.
- Garnish with herbs and add any final spoonfuls of jam or honey. Step back and adjust any empty spots until the board feels balanced.
Notes
Why You’ll Love This This Recipe
This board style is easy to customize, looks impressive on any table, and works for casual snacking or special gatherings. You can mix sweet and savory bites, use ingredients you already have, and create something that feels abundant without much effort.
This Recipe Ingredients & Substitutions
Here’s a simple guide for building a balanced board.
- Cheese, use a mix of soft, firm, and crumbly cheeses for variety
- Turkey slices or turkey bacon, for a savory protein option
- Fresh fruit, such as grapes, berries, figs, or sliced apples
- Dried fruit, for color and a chewy texture
- Crackers or sliced bread, choose plain and seeded options
- Nuts, like almonds, pistachios, or walnuts
- Olives or pickles, for a salty contrast
- Fresh herbs, such as rosemary, thyme, or basil
- Honey, jam, or fruit preserves, for a sweet touch
- Chocolate or small cookies, if you want a dessert-style board
For substitutions, use whatever is freshest and most affordable. If you do not have a certain cheese, swap in another with a similar texture. For the protein, use turkey bacon or simply add more cheese, nuts, and fruit.
Step-by-Step Instructions to Make This Recipe
Step 1: Choose Your Board
Start with a board, platter, or large serving tray. A wooden board feels classic, but a marble or ceramic platter works beautifully too.
Step 2: Place the Anchor Items
Set down the largest items first, like cheese wedges, small bowls, or folded slices of turkey. Spacing these around the board helps create a natural flow.
Step 3: Add the Smaller Bites
Fill in with crackers, fruit, nuts, and olives. Tuck each item close together so the board looks full and inviting.
Step 4: Build Color and Texture
Mix soft, crisp, glossy, and creamy ingredients. A little contrast goes a long way in making the board look styled and intentional.
Step 5: Finish With Fresh Touches
Garnish with herbs and add any final spoonfuls of jam or honey. Step back and adjust any empty spots until the board feels balanced.
Tips for Success
Use odd numbers of ingredients when you can, because they usually look more natural on a board. Slice some cheeses ahead of time so guests can help themselves easily. If you want a cleaner look, group similar colors together, then break them up with herbs or nuts.
Variations of This Recipe
You can turn this idea into a breakfast board with yogurt, berries, and granola. For a dessert version, add chocolate, cookies, marshmallows, and strawberries. For a more savory spread, lean into cheeses, turkey slices, olives, and seeded crackers.
Serving Suggestions: What to Pair with This Recipe
Serve the board with sparkling water, lemonade, iced tea, or a fresh juice. It also pairs nicely with a light soup, a simple salad, or baked flatbread if you want to turn it into a fuller meal.
Storage & Reheating Instructions
Charcuterie boards are best assembled shortly before serving. If you have leftovers, store cheeses, meats, fruit, and crackers separately in airtight containers. Keep fruit chilled and crackers at room temperature so they stay fresh and crisp. Reheating is usually not needed, but cold ingredients can sit at room temperature for a short time before serving again.
Memories Made Around the Table
There is something lovely about a board that invites people to linger, chat, and nibble at their own pace. A well-styled spread can turn a simple evening into a memory, especially when everyone gathers close and reaches for their favorite bite.
FAQs
How do I make a charcuterie board look full?
Use a mix of large and small items, then fill every gap with fruit, nuts, or crackers. A full board looks more polished and generous.
What cheeses work best on a board?
Choose a soft cheese, a firm cheese, and a crumbly cheese for variety. This gives guests different textures and flavors to enjoy.
How far ahead can I assemble it?
You can prep ingredients a few hours ahead, but assemble the board close to serving time for the freshest look and texture.
How many items should I include?
Three to five cheese and protein options, plus several fruits, crackers, and accents, is usually enough for a balanced spread.
Final Thoughts
Styling a beautiful board does not have to be complicated. With a little color, texture, and thoughtful placement, you can make a simple spread feel special every time.