
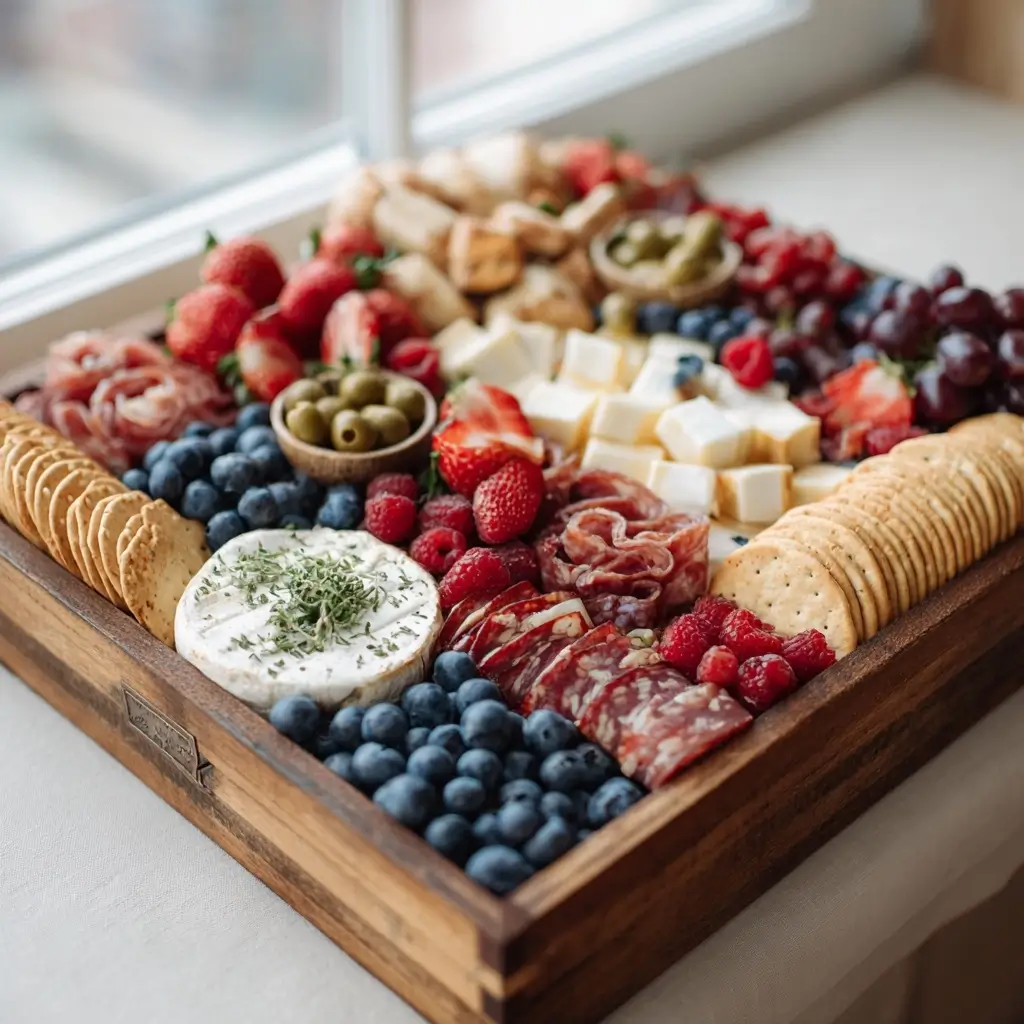
Building a beautiful charcuterie board does not have to feel intimidating. With a few simple layering tricks and the right mix of colors, textures, and flavors, you can create a board that looks impressive and feels inviting.
Charcuterie Board Tips
Equipment
- 1 Board or Platter
- 1 Small bowls for spreads, olives, or sticky ingredients
Ingredients
- 2 to 4 kinds of cheese choose from cheddar, gouda, brie, or mozzarella
- cured meats such as salami, turkey slices, or turkey pepperoni
- fresh fruit like grapes, berries, figs, apple slices, or pear slices
- dried fruit such as apricots, dates, or cranberries
- crackers and sliced baguette
- olives or pickles
- nuts like almonds, pistachios, or cashews
- spreads such as honey, mustard, jam, or fruit preserves
- optional extras like fresh herbs, chocolate, or roasted vegetables
Instructions
- Pick a large wooden board, platter, or baking tray. Make sure it has enough space so the ingredients can breathe and look full without being crowded.
- Place bowls or small dishes for spreads, olives, or sticky ingredients first. These help define the layout and give you a few visual starting points.
- Set the cheeses around the board in different shapes and sizes. Slice some pieces ahead of time, leave others whole, and vary the placement so the board feels relaxed and natural.
- Fold or roll the meats and tuck them beside the cheese. Add fresh fruit in clusters, then fill in gaps with dried fruit for color and texture.
- Fan out crackers, tuck in nuts, and add small handfuls of herbs or extra garnishes. Keep working outward until the board looks abundant and balanced.
- Give the board one last look from above and adjust anything that feels too crowded or sparse. Serve right away, or chill briefly if needed before guests arrive.
Notes
Why You’ll Love This This Dish
This board is the kind of centerpiece that works for casual snacking, holiday gatherings, game night, or an easy appetizer spread. It is flexible, easy to customize, and always feels a little special without requiring much cooking.
This Dish Ingredients & Substitutions
- Cheeses, choose 2 to 4 kinds such as cheddar, gouda, brie, or mozzarella
- Cured meats, such as salami, turkey slices, or turkey pepperoni
- Fresh fruit, like grapes, berries, figs, apple slices, or pear slices
- Dried fruit, such as apricots, dates, or cranberries
- Crackers and sliced baguette
- Olives or pickles
- Nuts, like almonds, pistachios, or cashews
- Spreads, such as honey, mustard, jam, or fruit preserves
- Optional extras, like fresh herbs, chocolate, or roasted vegetables
For substitutions, use any mix of familiar ingredients you already love. If you want a meat-free board, add more cheese, dips, nuts, and fruit. If you need a nut-free version, simply swap in extra crackers, vegetables, or seeds.
Step-by-Step Instructions to Make This Dish
Step 1, Choose your board
Pick a large wooden board, platter, or baking tray. Make sure it has enough space so the ingredients can breathe and look full without being crowded.
Step 2, Add the anchors
Place bowls or small dishes for spreads, olives, or sticky ingredients first. These help define the layout and give you a few visual starting points.
Step 3, Arrange the cheeses
Set the cheeses around the board in different shapes and sizes. Slice some pieces ahead of time, leave others whole, and vary the placement so the board feels relaxed and natural.
Step 4, Layer the meats and fruit
Fold or roll the meats and tuck them beside the cheese. Add fresh fruit in clusters, then fill in gaps with dried fruit for color and texture.
Step 5, Fill the spaces
Fan out crackers, tuck in nuts, and add small handfuls of herbs or extra garnishes. Keep working outward until the board looks abundant and balanced.
Step 6, Finish and serve
Give the board one last look from above and adjust anything that feels too crowded or sparse. Serve right away, or chill briefly if needed before guests arrive.
Tips for Success
Use a mix of soft, hard, creamy, crunchy, sweet, and salty ingredients so every bite feels interesting. Let some items overlap a little, because a slightly layered look feels more abundant and polished.
Try to build in odd numbers when you can, since small clusters often look more natural than perfectly even rows. Also, keep wet ingredients in small bowls so the crackers and bread stay crisp.
Variations of This Dish
You can build a breakfast-style board with cheese, fruit, jam, yogurt dip, and toasted bread. For a dessert board, swap in cookies, fresh berries, chocolate, marshmallows, and sweet dips.
For a savory version, add roasted vegetables, hummus, marinated artichokes, and crunchy breadsticks. You can also make it seasonal with fall apples and cranberries, or summer peaches and fresh herbs.
Serving Suggestions: What to Pair with This Dish
Serve this board with sparkling water, lemonade, iced tea, or a simple fruit punch. It pairs nicely with soups, salads, grilled chicken, or pasta for a fuller spread.
If you are hosting, add napkins, small plates, and cheese knives nearby so guests can help themselves easily. A few extra crackers on the side never hurts, either.
Storage & Reheating Instructions
Store leftovers in separate airtight containers whenever possible. Cheese, meats, fruit, and crackers keep best when stored apart, because that helps preserve texture.
There is no reheating needed for a charcuterie board. If you want to serve the cheese at its best, let it sit at room temperature for about 20 to 30 minutes before eating.
Memories Made Around the Table
Some of my favorite gatherings have started around a board like this, with everyone reaching in, chatting, and discovering new flavor combinations. It is simple food, but it has a way of bringing people close.
FAQs
How far in advance can I build a charcuterie board?
You can prep the ingredients a few hours ahead, but it is best to assemble the board close to serving time so everything stays fresh and crisp.
How do I make a charcuterie board look full?
Use small clusters, overlap ingredients slightly, and fill in gaps with crackers, fruit, and herbs. A full look comes from layering, not from piling everything in one spot.
What is the best cheese for a charcuterie board?
A good mix usually includes one soft cheese, one hard cheese, and one creamy or spreadable cheese. That gives your guests a nice variety of textures and flavors.
Can I make this without meat?
Yes, absolutely. Add more cheese, fruit, nuts, olives, roasted vegetables, hummus, and crackers to create a satisfying meat-free board.
Final Thoughts
Once you learn the basic formula, building a charcuterie board becomes easy and fun. Start with variety, layer with care, and let the colors and textures do most of the work.