
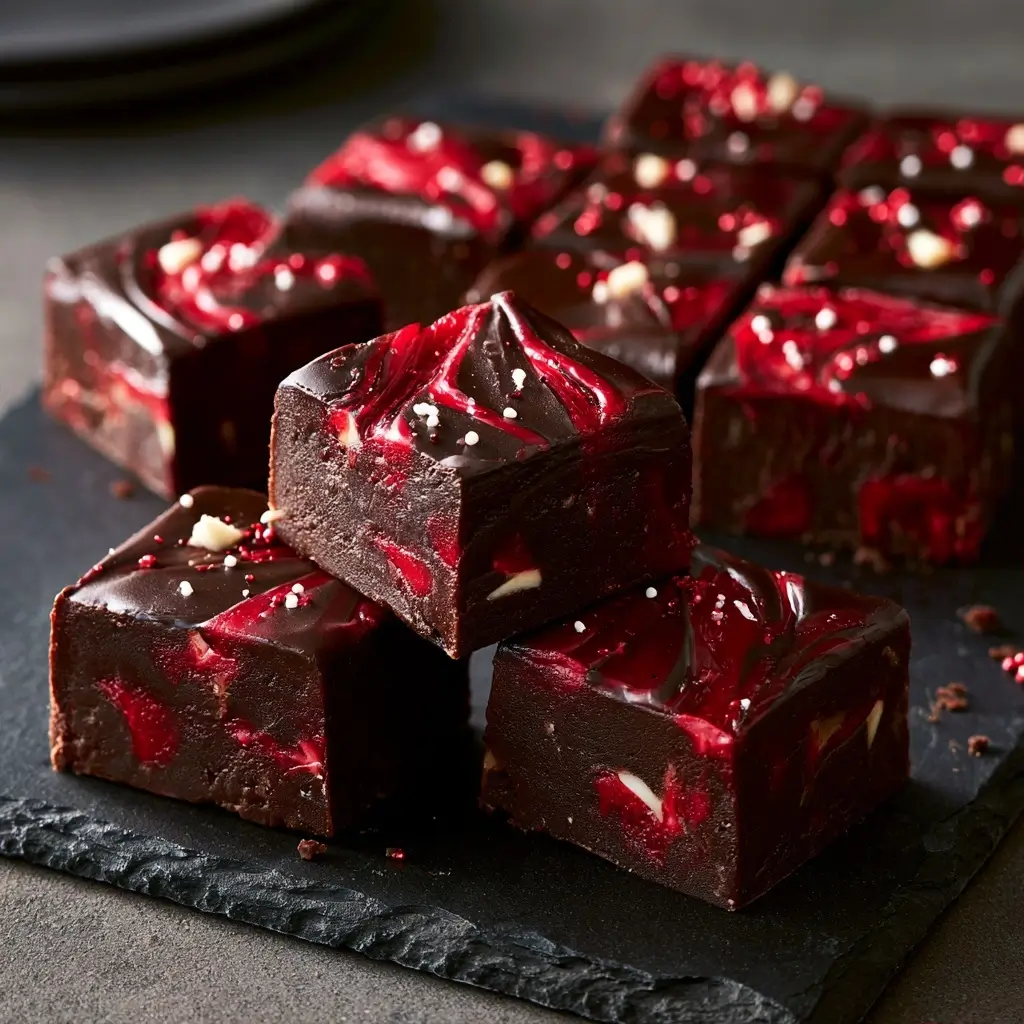
Vampire Fudge is a fun Halloween treat that looks spooky, tastes rich, and comes together with very little effort. It is a great make-ahead sweet for parties, classroom events, or a cozy night of holiday movie watching.
Vampire Fudge
Equipment
- 1 8x8 inch baking pan lined with parchment paper
- 1 Saucepan low heat
- 1 Knife for swirling and cutting
Ingredients
Ingredients
- 1 14-ounce can sweetened condensed milk
- 2 cups white chocolate chips
- 2 tablespoons butter
- 1 teaspoon alcohol-free vanilla
- 1 pinch salt
- 1 red gel food coloring to tint part of the fudge
- 0.25 cup chocolate chips or cocoa powder optional, for a darker marbled effect
Instructions
- Line an 8x8-inch baking pan with parchment paper, leaving a little overhang on the sides.
- In a saucepan over low heat, melt the butter with the sweetened condensed milk. Stir in the white chocolate chips until the mixture is smooth and glossy.
- Remove the pan from the heat, then stir in the alcohol-free vanilla and salt.
- Transfer part of the fudge mixture to a bowl and tint it with red food coloring. Leave the rest plain, or stir in a little cocoa powder if you want a darker contrast.
- Spoon the mixtures into the prepared pan, then drag a knife through the top to create a marbled look. Chill until firm, then lift out and cut into squares.
Notes
Why You’ll Love This Vampire Fudge
This fudge has that classic creamy, chocolatey bite everyone expects, plus a bright red swirl that makes it feel perfect for Halloween. It is simple enough for beginners, but still looks festive and impressive on a dessert table.
Vampire Fudge Ingredients & Substitutions
You only need a few easy ingredients to make this rich treat. Here is what goes into it, along with a few simple swap ideas.
- Sweetened condensed milk, for a smooth and creamy fudge base
- White chocolate chips, which melt into the base and help it set
- Butter, for a richer texture
- Alcohol-free vanilla, for warmth and flavor
- Pinch of salt, to balance the sweetness
- Red gel food coloring, for the spooky vampire look
- Chocolate chips or cocoa powder, if you want a darker marbled effect
If you prefer, you can use dark chocolate chips instead of white chocolate for a deeper flavor. For the red swirl, a little extra food coloring goes a long way, so add it slowly until you like the shade.
Step-by-Step Instructions to Make Vampire Fudge
1. Prepare the pan
Line an 8×8-inch baking pan with parchment paper, leaving a little overhang on the sides. This makes it easy to lift the fudge out later.
2. Melt the base
In a saucepan over low heat, melt the butter with the sweetened condensed milk. Stir in the white chocolate chips until the mixture is smooth and glossy.
3. Add flavor
Remove the pan from the heat, then stir in the alcohol-free vanilla and salt. Mix well so the flavor is evenly blended.
4. Create the vampire effect
Transfer part of the fudge mixture to a bowl and tint it with red food coloring. Leave the rest plain, or stir in a little cocoa powder if you want a darker contrast.
5. Swirl and set
Spoon the mixtures into the prepared pan, then drag a knife through the top to create a marbled look. Chill until firm, then lift out and cut into squares.
Tips for Success
Keep the heat low so the chocolate does not scorch. Stir often, especially as the mixture starts to melt and thicken. For the neatest slices, chill the fudge fully before cutting and wipe your knife between cuts.
Variations of Vampire Fudge
You can play with this recipe in a few fun ways. Add mini chocolate chips for extra texture, sprinkle crushed cookies on top, or use orange and black sprinkles for more Halloween color. If you want a deeper chocolate flavor, swap some or all of the white chocolate for dark chocolate.
Serving Suggestions: What to Pair with Vampire Fudge
Serve this fudge alongside hot cocoa, apple cider, or a platter of Halloween cookies. It also works nicely with fresh strawberries, which add a bright, juicy contrast to the rich sweetness. For parties, place the squares in mini paper cups for an easy grab-and-go dessert.
Storage & Reheating Instructions
Store the fudge in an airtight container in the refrigerator for up to 2 weeks. Separate layers with parchment paper if you stack the pieces. For longer storage, freeze the fudge for up to 2 months, then thaw in the refrigerator before serving. This recipe is best enjoyed chilled, so reheating is not needed.
Memories Made Around the Table
Halloween treats always seem to bring people together, and this one is especially fun to share. I love seeing the swirled colors on a dessert tray, because it instantly adds a playful, festive touch to the season.
FAQs
Can I make Vampire Fudge ahead of time?
Yes, this fudge is a great make-ahead dessert. In fact, chilling it overnight can make cutting easier and help the flavor settle.
Why is my fudge too soft?
It may need more chilling time, or the mixture may have been heated too quickly. Keep the heat low and let it set fully before slicing.
Can I use a different color instead of red?
Absolutely. Red gives the vampire look, but orange, purple, or green can make the fudge feel even more festive for Halloween.
Do I have to use white chocolate chips?
No, you can use dark or milk chocolate chips if you want a richer flavor. The look will change, but the method stays the same.
Final Thoughts
Vampire Fudge is the kind of Halloween dessert that is easy to make, fun to decorate, and always a hit with guests. If you want a simple treat that feels playful and memorable, this one is worth keeping in your seasonal dessert rotation.