
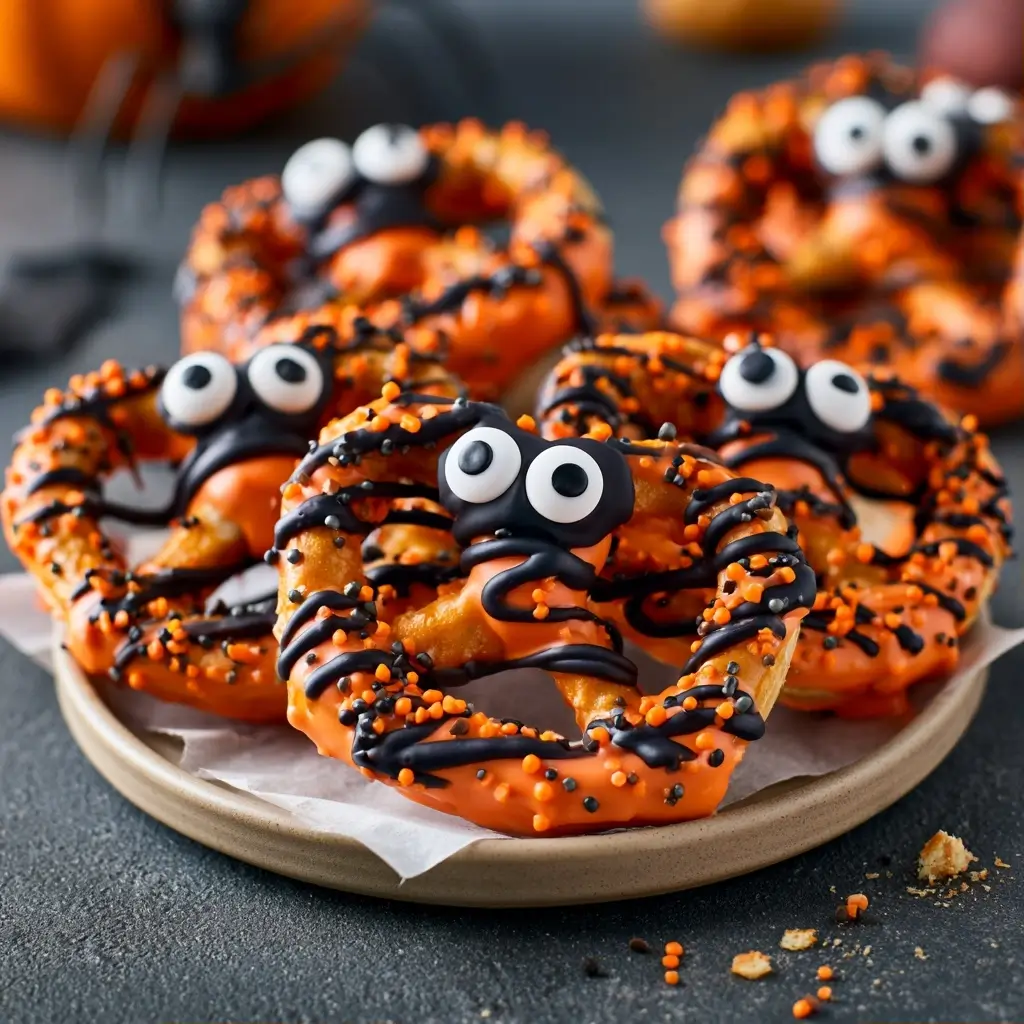
These customizable Halloween pretzels are the kind of treat that makes a spooky snack table feel instantly fun. They are easy to decorate, kid-friendly to assemble, and perfect when you want something sweet, salty, and colorful without a lot of fuss.
Halloween Pretzels
Equipment
- 1 Baking Sheet
- 1 Parchment Paper
- 2 Microwave-safe bowls for melting chocolate
Ingredients
- 12 pretzel twists or pretzel snaps
- 8 oz white chocolate or white candy melts
- 8 oz orange candy melts or colored chocolate
- 2 tbsp black decorating gel or melted dark chocolate
- ¼ cup sprinkles candy eyes, or chopped candy pieces
- ¼ cup crushed pretzels or cookie crumbs optional
Instructions
- Line a baking sheet with parchment paper. Set out your pretzels, melted chocolate, and decorations so you can move quickly once the coating is ready.
- Melt the white chocolate and colored melts in separate bowls until smooth. Stir often so the chocolate stays glossy and easy to work with.
- Dip each pretzel halfway into the melted chocolate, or drizzle the chocolate over the top for a more rustic look. Let any extra chocolate drip off before placing the pretzel on the prepared tray.
- While the chocolate is still soft, add sprinkles, candy eyes, or crushed candy pieces. Work in small batches so the toppings stick well before the coating sets.
- Allow the pretzels to harden at room temperature, or chill them briefly if you need them to set faster. Once firm, they are ready to serve or package.
Notes
Why You’ll Love This Halloween Pretzels
This recipe is all about simple fun. You can mix and match colors, toppings, and shapes to match your party theme, and the result always looks festive with very little effort. They are also a great make-ahead treat for school parties, movie nights, or a Halloween dessert tray.
Halloween Pretzels Ingredients & Substitutions
You only need a few basic ingredients to make these treats. Here is a simple starting point, plus a few easy swaps if you want to change up the look or flavor.
- Pretzel twists or pretzel snaps
- White chocolate or candy melts
- Orange candy melts or colored chocolate
- Black decorating gel or melted dark chocolate
- Sprinkles, candy eyes, or chopped candy pieces
- Optional, crushed pretzels or cookie crumbs for extra texture
Substitutions: Use milk chocolate if you prefer a richer flavor, or choose different colored melts to match your party colors. If you want a brighter finish, add a few drops of oil-based food coloring to white chocolate designed for melting. For decorating, swap candy eyes with tiny dots of melted chocolate.
Step-by-Step Instructions to Make Halloween Pretzels
Step 1: Prep the workspace
Line a baking sheet with parchment paper. Set out your pretzels, melted chocolate, and decorations so you can move quickly once the coating is ready.
Step 2: Melt the chocolate
Melt the white chocolate and colored melts in separate bowls until smooth. Stir often so the chocolate stays glossy and easy to work with.
Step 3: Coat the pretzels
Dip each pretzel halfway into the melted chocolate, or drizzle the chocolate over the top for a more rustic look. Let any extra chocolate drip off before placing the pretzel on the prepared tray.
Step 4: Add the decorations
While the chocolate is still soft, add sprinkles, candy eyes, or crushed candy pieces. Work in small batches so the toppings stick well before the coating sets.
Step 5: Let them set
Allow the pretzels to harden at room temperature, or chill them briefly if you need them to set faster. Once firm, they are ready to serve or package.
Tips for Success
Keep your chocolate warm but not too hot, since overheated chocolate can become thick and hard to spread. Use parchment paper for easy cleanup and to keep the pretzels from sticking. If you are making these with kids, prep the toppings ahead of time so decorating stays organized and fun.
Variations of Halloween Pretzels
Try making spider pretzels with candy eyes and thin chocolate drizzle for legs. You can also create mummy-style pretzels with white chocolate zigzags and tiny dark chocolate eyes. For a sweeter version, dip the pretzels in chocolate and finish with crushed cookies or orange sprinkles.
Serving Suggestions: What to Pair with Halloween Pretzels
These pretzels look great alongside popcorn, fruit skewers, caramel apples, or a mix of other party snacks. They also pair nicely with hot chocolate, apple cider, or a simple glass of milk for an easy after-school treat.
Storage & Reheating Instructions
Store the finished pretzels in an airtight container at room temperature for up to 1 week. If your kitchen is warm, keep them in the refrigerator so the chocolate stays firm. There is no reheating needed, just let chilled pretzels sit out for a few minutes before serving if you prefer a softer bite.
Memories Made Around the Table
There is something special about recipes like this, because they invite everyone to join in. I love how a tray of decorated pretzels can turn an ordinary afternoon into a little celebration, with everyone choosing colors, toppings, and their own favorite design.
FAQs
Can I make these Halloween pretzels ahead of time?
Yes, they are a great make-ahead treat. Once the chocolate is fully set, store them in an airtight container until you are ready to serve.
What is the best chocolate for dipping?
Chocolate melts or candy melts work best because they melt smoothly and set well. If using regular chocolate, add a little neutral oil to help it stay glossy and easier to dip.
How do I keep the decorations from sliding off?
Add sprinkles and candy decorations while the coating is still soft. If the chocolate starts to set, work in smaller batches so the toppings have time to stick.
Can I make these with different pretzels?
Absolutely. Pretzel twists, rods, snaps, or mini pretzels all work well. Just choose the shape that fits the design you want.
Final Thoughts
These customizable Halloween pretzels are simple, festive, and endlessly fun to make. Whether you are planning a party or just want a playful treat at home, they bring a little seasonal magic to the table with very little effort.