
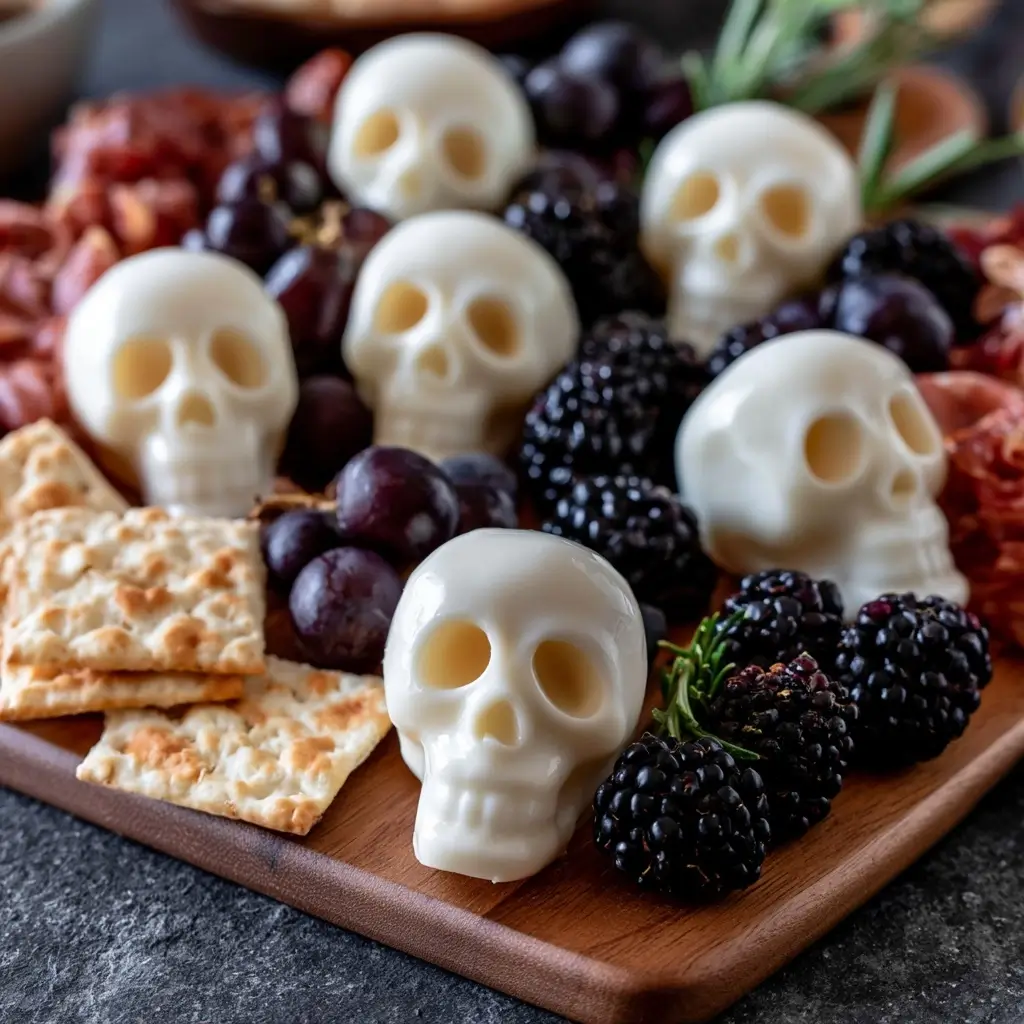
These Halloween Mozzarella Skulls are a playful way to add a spooky touch to your charcuterie board. They are simple to shape, fun to serve, and surprisingly easy to make ahead for a festive gathering.
Halloween Mozzarella Skulls
Equipment
- 1 Small skull silicone mold
- 1 Saucepan
- 1 Spoon
Ingredients
- 8 oz fresh mozzarella balls or cheese curds
- 1 2 milk as needed for smooth melting
- 1 packet unflavored gelatin
- 0.25 tsp salt
- 0.25 tsp black pepper optional
- 1 tbsp olive oil
Instructions
- Add the mozzarella and milk to a saucepan over low heat. Stir gently until the cheese begins to soften and melt. Keep the heat low so the mixture stays smooth.
- Sprinkle in the gelatin and stir until fully dissolved. Add the salt, pepper, and olive oil, then mix until everything looks even and glossy.
- Spoon the warm mixture into the skull mold, pressing it in gently so it reaches all the details. Smooth the tops with the back of a spoon.
- Place the mold in the refrigerator and let it set until the skulls are firm enough to release cleanly. This usually takes at least a couple of hours.
- Carefully pop the skulls out of the mold and arrange them on a board with your favorite charcuterie items. Serve chilled or let them sit briefly at room temperature for a softer bite.
Notes
Why You’ll Love This Halloween Mozzarella Skulls
This recipe is all about easy entertaining with a little Halloween flair. The creamy mozzarella has a mild flavor that works beautifully with crackers, fruit, olives, and cured meats, so you can build a board that looks impressive without much effort.
I also love that these little skulls feel creative without being fussy. With just a few ingredients and a silicone mold, you can make something that gets people talking the moment it hits the table.
Halloween Mozzarella Skulls Ingredients & Substitutions
- Fresh mozzarella balls or cheese curds, these give the skulls their soft, creamy texture.
- Milk, helps the mozzarella melt smoothly.
- Unflavored gelatin, use agar-agar if you prefer a plant-based setting ingredient.
- Salt, just a small amount brings out the flavor.
- Black pepper, optional, for a gentle savory note.
- Olive oil, a little helps keep the mixture silky.
- Small skull silicone mold, this shapes the cheese into the spooky look.
If you want a stronger flavor, you can stir in finely chopped herbs, a pinch of garlic powder, or a little smoked paprika. For serving, pair the skulls with grapes, crackers, nuts, and sliced vegetables.
Step-by-Step Instructions to Make Halloween Mozzarella Skulls
Step 1: Warm the cheese mixture
Add the mozzarella and milk to a saucepan over low heat. Stir gently until the cheese begins to soften and melt. Keep the heat low so the mixture stays smooth.
Step 2: Add the setting ingredient
Sprinkle in the gelatin and stir until fully dissolved. Add the salt, pepper, and olive oil, then mix until everything looks even and glossy.
Step 3: Fill the mold
Spoon the warm mixture into the skull mold, pressing it in gently so it reaches all the details. Smooth the tops with the back of a spoon.
Step 4: Chill until firm
Place the mold in the refrigerator and let it set until the skulls are firm enough to release cleanly. This usually takes at least a couple of hours.
Step 5: Unmold and serve
Carefully pop the skulls out of the mold and arrange them on a board with your favorite charcuterie items. Serve chilled or let them sit briefly at room temperature for a softer bite.
Tips for Success
Use low heat so the mozzarella does not seize or become grainy. If the mixture starts to look too thick, add a splash more milk and stir until smooth.
Make sure the mold is clean and lightly oiled if needed, especially if the details are very small. Chilling the skulls long enough is the key to keeping their shape when unmolding.
Variations of Halloween Mozzarella Skulls
Try adding chopped basil or parsley for a fresh herbal version. A little garlic powder gives the cheese a more savory edge that works well with cured meats and olives.
You can also make mini cheese shapes in different Halloween molds if you want a mixed spooky board. For a more colorful platter, surround the skulls with roasted peppers, dark grapes, and crisp cucumber slices.
Serving Suggestions: What to Pair with Halloween Mozzarella Skulls
These skulls look especially charming on a board with crackers, salami, grapes, figs, marinated olives, and toasted nuts. They also pair nicely with sliced pears, cherry tomatoes, and a drizzle of honey on the side.
If you are serving a larger crowd, add one or two dips like hummus or a simple herb yogurt dip. The mild cheese helps balance both salty and sweet board elements.
Storage & Reheating Instructions
Store the mozzarella skulls in an airtight container in the refrigerator for up to 3 days. Keep them separate from very wet ingredients so they hold their shape and texture.
These are best served chilled or slightly cool, so reheating is not needed. If they soften too much at room temperature, place them back in the fridge for a short while before serving again.
Memories Made Around the Table
There is something so fun about bringing out a board that makes everyone smile before the first bite. Little touches like these often become the thing people remember most from a holiday gathering, especially when kids and adults both lean in to see how they were made.
FAQs
Can I make Halloween Mozzarella Skulls ahead of time?
Yes, you can make them a day or two in advance. Keep them chilled until you are ready to build the board.
What kind of mold works best?
A small silicone skull mold works best because it makes unmolding much easier. Flexible molds help keep the details intact.
Can I use shredded mozzarella?
Fresh mozzarella or cheese curds work best for this recipe. Shredded mozzarella may not melt as smoothly or set with the same texture.
How do I keep the skulls from sticking?
Let them chill fully before removing them, and lightly oil the mold if needed. Gentle handling makes a big difference.
Final Thoughts
Halloween Mozzarella Skulls are a fun little project that adds personality to any spooky spread. They are easy to make, easy to serve, and just unexpected enough to make your charcuterie board feel extra special.