
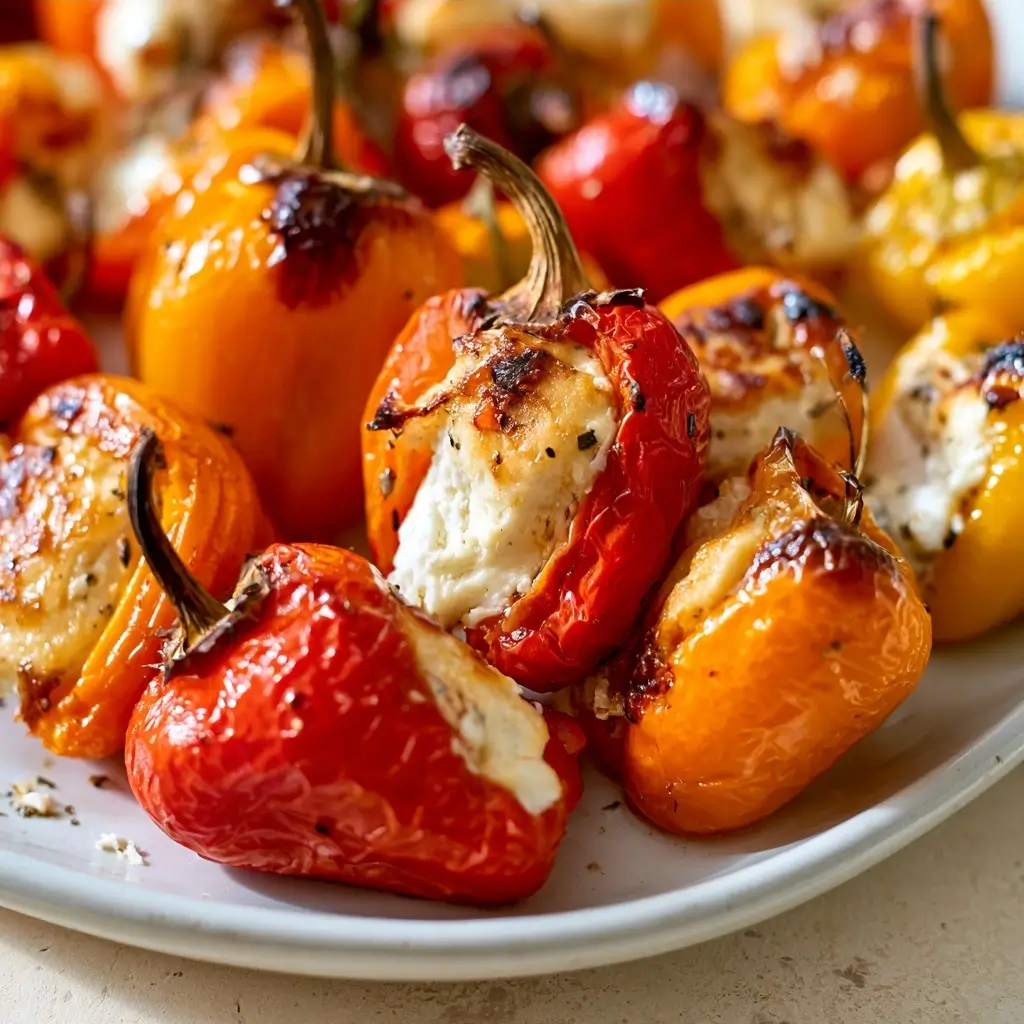
These goat cheese stuffed mini peppers are creamy, tangy, and easy to serve as a colorful Thanksgiving appetizer. I fill sweet mini peppers with herbed goat cheese, then roast them until tender with lightly golden tops.
Why You’ll Love These Stuffed Mini Peppers
They look festive on a holiday platter but take just a few simple steps to prepare. The soft, tangy filling pairs beautifully with the peppers’ natural sweetness, while a little lemon zest and fresh thyme keep each bite bright. You can assemble them ahead, then bake them shortly before guests arrive.
Stuffed Mini Peppers Ingredients & Substitutions
- 12 mini sweet peppers, about 1 pound
- 8 ounces goat cheese, softened
- 2 ounces cream cheese, softened
- 1 small garlic clove, finely grated or minced
- 1 teaspoon finely grated lemon zest
- 1 tablespoon chopped fresh thyme, plus a little more for garnish
- 1 tablespoon chopped fresh parsley
- 2 tablespoons olive oil, divided
- 1/4 teaspoon fine salt
- 1/8 teaspoon black pepper
- 1/4 cup panko breadcrumbs
- 1 teaspoon honey, for drizzling, optional
For a softer, extra-creamy filling, add another spoonful of cream cheese. Chopped chives can stand in for parsley, and regular breadcrumbs work in place of panko. If you prefer a savory finish, skip the honey drizzle.
Step-by-Step Instructions to Make Stuffed Mini Peppers
1. Heat the oven and prepare the peppers
Heat the oven to 400°F (200°C). Line a rimmed baking sheet with parchment paper. Slice each pepper in half lengthwise and remove the seeds and membranes. Arrange the halves cut side up on the prepared sheet.
2. Mix the filling
In a medium bowl, stir together the goat cheese, cream cheese, garlic, lemon zest, thyme, parsley, salt, and black pepper until smooth. A small spoon or butter knife makes it easy to fill the pepper halves evenly.
3. Fill and top the peppers
Spoon the cheese mixture into each pepper half. Toss the panko with 1 tablespoon of olive oil, then sprinkle a little over each filled pepper. Drizzle the remaining olive oil over the peppers.
4. Roast until tender
Bake for 12 to 16 minutes, until the peppers are tender and the filling is warm. For a deeper golden top, switch the oven to broil for 1 to 2 minutes, watching closely so the breadcrumbs do not burn.
5. Garnish and serve
Let the peppers cool for a few minutes. Finish with extra thyme and, if you like a sweet contrast, a light drizzle of honey. Serve warm or at room temperature.
Tips for Success
- Choose peppers that are similar in size so they cook evenly.
- Let the cheese soften at room temperature for about 20 minutes, which makes mixing and filling easier.
- Keep the pepper halves cut side up while baking to hold the filling in place.
- Check the peppers near the end of baking. Smaller peppers may become tender sooner.
- For a neat platter, transfer the baked peppers with a thin spatula and arrange them in a single layer.
Variations of Stuffed Mini Peppers
Stir chopped toasted walnuts into the cheese mixture for a little crunch, or add a pinch of red pepper flakes for gentle heat. For an herb-forward version, use chopped chives and rosemary in place of some of the thyme. You can also leave off the breadcrumbs for a smooth, creamy top, or add finely chopped dried cranberries for a festive sweet-tart note.
Serving Suggestions: What to Pair with Stuffed Mini Peppers
Serve these as part of a Thanksgiving appetizer spread alongside crisp vegetables, olives, and a simple dip. They also pair nicely with a green salad or roasted vegetables if you want to carry them into a light meal. Set them out warm on a platter, with small napkins nearby for easy picking up.
Storage & Reheating Instructions
Store cooled leftovers in an airtight container in the refrigerator for up to 3 days. Reheat them on a baking sheet at 350°F (175°C) for 8 to 10 minutes, until warmed through. The microwave works for a quick reheat, though the breadcrumb topping will be softer. For make-ahead prep, fill the peppers and refrigerate them covered for up to 1 day, then add the panko topping and bake just before serving.
Memories Made Around the Table
I love setting out a platter of these bright little peppers while everyone gathers and catches up before the main meal. Their creamy centers and sweet roasted edges make them easy to enjoy between conversations, and their cheerful color feels right at home among the Thanksgiving dishes.
FAQs
Can I make stuffed mini peppers ahead of time?
Yes. Fill the pepper halves up to a day ahead, cover, and refrigerate. Add the breadcrumb topping shortly before baking for the best texture.
Can I serve these peppers at room temperature?
Yes. They are delicious warm, but they also hold up well at room temperature for serving. For food quality, avoid leaving them out for an extended period.
How do I know when the peppers are done?
The peppers should be tender when pierced with a fork, and the filling should be warm. The timing can vary depending on the size and thickness of the peppers.
Can I use another cheese?
Yes. Soft feta can replace some or all of the goat cheese, though it has a saltier, more crumbly texture. Mix it with the cream cheese until the filling is easy to spoon.
Final Thoughts
These goat cheese stuffed mini peppers bring an easy, colorful bite to a Thanksgiving spread. Prepare them ahead, roast them just before guests arrive, and serve them while the filling is warm and creamy.
Stuffed Mini Peppers
Equipment
- 1 Rimmed baking sheet
- 1 Parchment Paper
- 1 medium bowl
- 1 Small spoon or butter knife
Ingredients
- 12 mini sweet peppers about 1 pound
- 8 ounces goat cheese softened
- 2 ounces cream cheese softened
- 1 small clove garlic finely grated or minced
- 1 teaspoon lemon zest finely grated
- 1 tablespoon fresh thyme chopped, plus a little more for garnish
- 1 tablespoon fresh parsley chopped
- 2 tablespoons olive oil divided
- 0.25 teaspoon fine salt
- 0.125 teaspoon black pepper
- 0.25 cup panko breadcrumbs
- 1 teaspoon honey for drizzling, optional
Instructions
- Heat the oven to 400°F (200°C). Line a rimmed baking sheet with parchment paper. Slice each pepper in half lengthwise and remove the seeds and membranes. Arrange the halves cut side up on the prepared sheet.
- In a medium bowl, stir together the goat cheese, cream cheese, garlic, lemon zest, thyme, parsley, salt, and black pepper until smooth.
- Spoon the cheese mixture into each pepper half. Toss the panko with 1 tablespoon of olive oil, then sprinkle a little over each filled pepper. Drizzle the remaining olive oil over the peppers.
- Bake for 12 to 16 minutes, until the peppers are tender and the filling is warm. For a deeper golden top, switch the oven to broil for 1 to 2 minutes, watching closely so the breadcrumbs do not burn.
- Let the peppers cool for a few minutes. Finish with extra thyme and, if desired, a light drizzle of honey. Serve warm or at room temperature.