
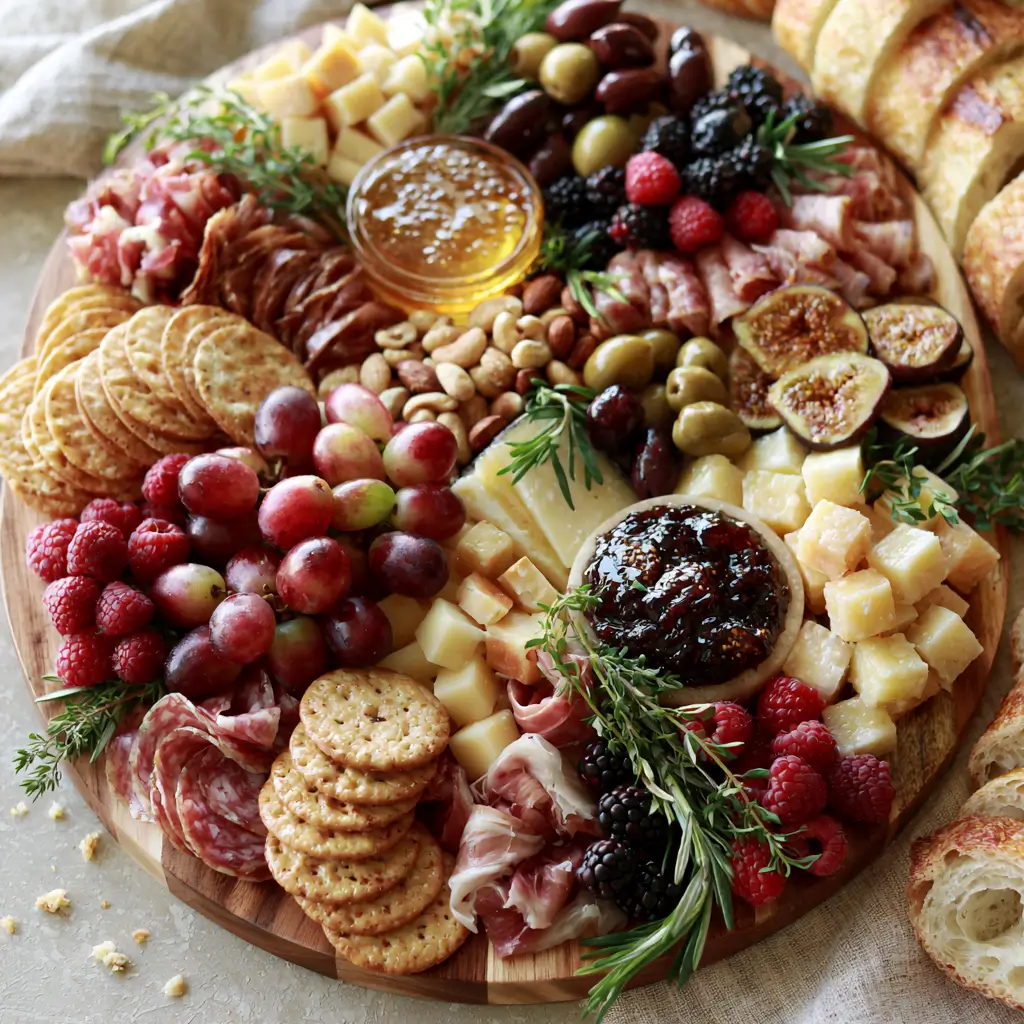
Building a charcuterie board is one of the easiest ways to make snacking feel special, whether you are hosting friends or putting together a cozy night at home. With a few thoughtful choices, you can create a board that looks beautiful, tastes balanced, and feels inviting from the first bite.
Charcuterie Board Step by Step
Equipment
- 1 Large wooden board, platter, or tray
- 1 Small bowls for honey or jam (optional)
Ingredients
Board Ingredients
- 1 to 2 assorted cheeses such as cheddar, gouda, brie, or manchego
- 1 to 2 cured meats such as turkey salami, turkey pepperoni, or sliced turkey ham
- 1 box crackers and breadsticks
- 2 cups fresh fruit such as grapes, berries, figs, or apple slices
- 1 cup crunchy additions such as nuts, olives, or pickles
- 1 cup sweet extras such as honey, jam, or dried fruit
- 1 small bunch fresh herbs for garnish, optional
Instructions
- Select a large wooden board, platter, or tray. Make sure it has enough space for all the ingredients without feeling crowded.
- Arrange the cheeses in different areas of the board. Cut one or two into slices or wedges so guests can start serving easily.
- Fold or roll the cured meats and tuck them near the cheeses. Spreading them around the board helps create balance and visual interest.
- Add clusters of grapes, berries, nuts, or crackers. Place smaller items in open spaces so the board looks full and abundant.
- Spoon small amounts of honey or jam into little bowls, then add olives, pickles, or dried fruit for extra variety.
- Slip in a few fresh herbs for color, then check for any empty spots and fill them with a final cracker or fruit slice.
Notes
Why You’ll Love This This Recipe
This board is wonderfully flexible, so you can mix and match ingredients based on what you have on hand. It also comes together quickly, which makes it ideal for last-minute gatherings, holiday spreads, or a simple weekend treat.
This Recipe Ingredients & Substitutions
- Assorted cheeses, such as cheddar, gouda, brie, or manchego
- Cured meats, such as turkey salami, turkey pepperoni, or sliced turkey ham
- Crackers and breadsticks
- Fresh fruit, such as grapes, berries, figs, or apple slices
- Crunchy additions, such as nuts, olives, or pickles
- Sweet extras, such as honey, jam, or dried fruit
- Fresh herbs for garnish, optional
For substitutions, swap any cheese you love, use gluten-free crackers if needed, or choose extra fruit and nuts for a lighter board. If you want more savory flavor, add roasted vegetables, hummus, or marinated artichokes.
Step-by-Step Instructions to Make This Recipe
Step 1: Choose your board
Select a large wooden board, platter, or tray. Make sure it has enough space for all the ingredients without feeling crowded.
Step 2: Place the cheeses first
Arrange the cheeses in different areas of the board. Cut one or two into slices or wedges so guests can start serving easily.
Step 3: Add the meats
Fold or roll the cured meats and tuck them near the cheeses. Spreading them around the board helps create balance and visual interest.
Step 4: Fill in with fruit and crunch
Add clusters of grapes, berries, nuts, or crackers. Place smaller items in open spaces so the board looks full and abundant.
Step 5: Add sweet and savory accents
Spoon small amounts of honey or jam into little bowls, then add olives, pickles, or dried fruit for extra variety.
Step 6: Finish with garnish
Slip in a few fresh herbs for color, then check for any empty spots and fill them with a final cracker or fruit slice.
Tips for Success
Use a mix of textures, soft, hard, creamy, and crunchy, so every bite feels different. Try to include a range of colors too, because a visually balanced board always feels more inviting. If you are serving a crowd, make more than you think you need, since boards tend to disappear quickly.
Variations of This Recipe
You can build a breakfast board with cheese, fruit, yogurt, and muffins. For a more elegant spread, add smoked salmon, fresh vegetables, and herb dip. If you want a dessert-style board, use chocolate, cookies, strawberries, and sweet spreads.
Serving Suggestions: What to Pair with This Recipe
Serve your board with sparkling water, fresh lemonade, iced tea, or a simple fruit spritzer. It also pairs nicely with soups, salads, or a light pasta dish if you are building a larger meal.
Storage & Reheating Instructions
Store leftovers in separate airtight containers in the refrigerator. Cheese and meats should be kept chilled, while crackers and breadsticks are best stored at room temperature in a sealed bag or container. This board is not meant for reheating, but the ingredients can be assembled again easily the next day.
Memories Made Around the Table
Some of my favorite gatherings have started with a board like this, where everyone naturally gathers, talks, and reaches for something different. It has a relaxed, welcoming feel that turns even an ordinary evening into something memorable.
FAQs
How far ahead can I build a charcuterie board?
You can prep most ingredients a few hours ahead, but it is best to assemble the board close to serving time so everything stays fresh and crisp.
What cheeses work best on a board?
A mix of soft and firm cheeses works best, such as brie, cheddar, gouda, and manchego. Variety helps keep the board interesting.
How do I keep the board from looking sparse?
Start with larger items first, then fill in every gap with fruit, crackers, nuts, or herbs. A full board usually looks more inviting than a minimal one.
Can I make this without meat?
Yes, absolutely. Add more cheese, fruit, nuts, vegetables, and dips to create a satisfying meatless board.
Final Thoughts
Learning how to build a charcuterie board is less about strict rules and more about creating a mix that feels balanced and beautiful. Once you know the basic flow, you can use it again and again for parties, holidays, or quiet nights in.